In the past, we’ve explored how teachers can use DonorsChoose to get Blocks Rock! for their classrooms. As another school year approaches, we want to help you explore Amazon Lists. Amazon Lists provide you with a new way to bring Blocks Rock! to your classroom, library, or afterschool program via community donations.
What are Amazon Lists?
Amazon Lists provide a way to store your wish list for Amazon items in one place. These lists can be private for personal use or be public. If you’re looking to get Blocks Rock! using Amazon Lists, you’ll create a shareable, public list that community members will use to donate to you or your organization.
Create Your Amazon List in Four Easy Steps
Step 1. Create Your Shopping List
First, log-in to your Amazon account. Once you’re logged in, click where it says “Hello, your name.” In that dropdown, you will see the option to “Create a List.”’
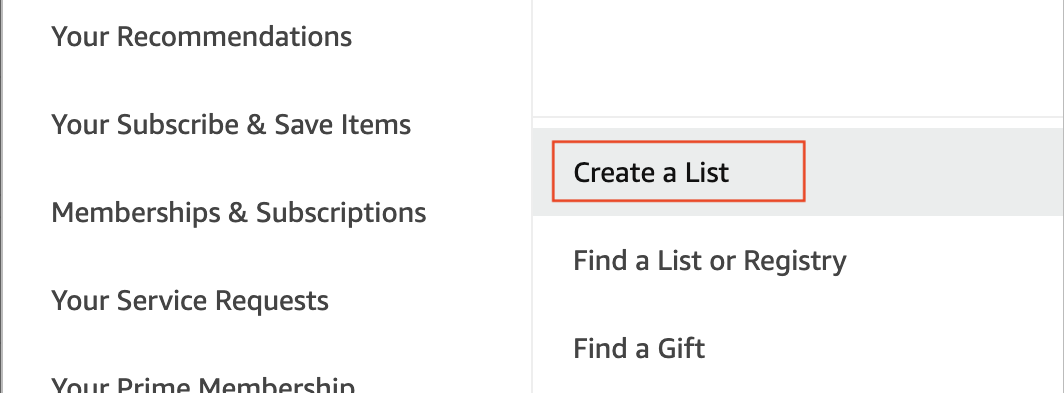
Once you click the button, give your list a name like “My Classroom Wish List” or “Mr. or Mrs. [Your Last Name]’s Room.”
Step 2. Manage Your List’s Settings
Your new, empty list will now be ready for you to set up. The default setting of a list is private, so we will start by changing that. Find the “...More” button and bring up the option to Manage Lists.

Change the privacy from “Private” to “Public” so that your community will be able to find you.
Then, fill in the rest of the information below these options. What you’ll be asked to provide is:
- Recipient and Recipient Information | Use this space to add your name and your school email address.
- Description | Here, you can describe who you are, what school you’re a part of, and leave a personal note to thank the community.
- Shipping Address | Make sure to select where you want your purchases to go.
Step 3. Find Items for Your Classroom
Now your shopping trip begins! Browse Amazon and select which items you would like to add to your wish list. When you’re on an item you want, like Blocks Rock!, simply find the Add to List button under the traditional shopping area and then select ‘My Classroom Wish List.’
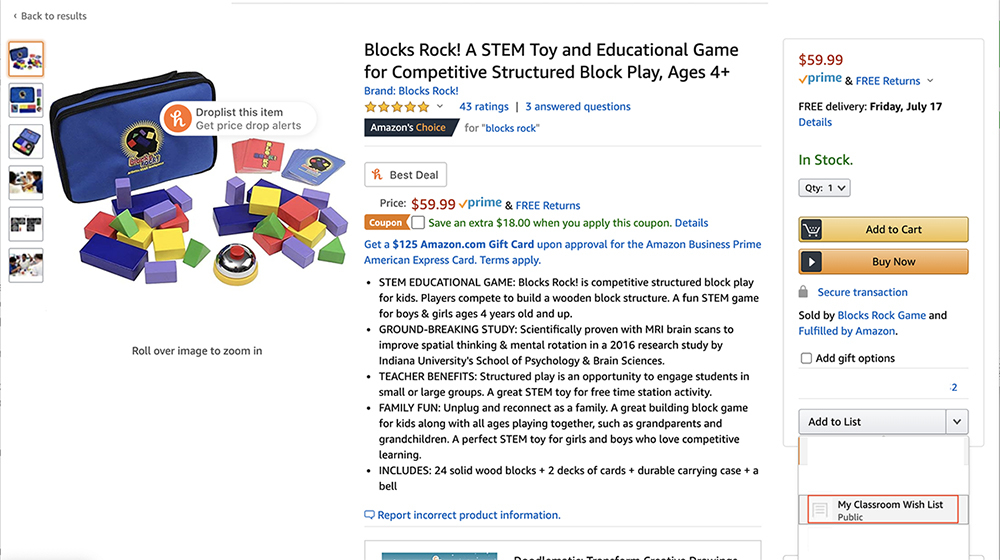
As long as an item is on Amazon, you are able to add it to your list.
4. Share Your List With the Community
Once you have filled your list with your classroom’s needs, you will need to share it in order for your community members to find it. Go back to your list and find the button that says “Send list to others” near the “...More” button.
When you click that, this box will show up:
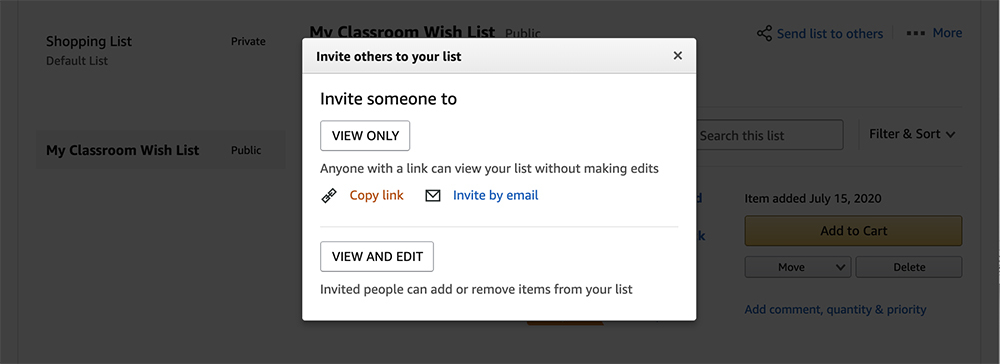
Copy the “View Only” link and share that on your social media profiles to let people know about your list! You can also send out your list directly via email, if you prefer to ask for donations that way. Another option you have is to add this link to your syllabus, in case parents would like to donate to your classroom.
When individuals click through that link, they will see the different items you’ve requested and be able to add it directly to their cart.
One thing you should know about this link is that even when you update your list and add items, your special link will stay the same. So you can continue shopping and adding items to your cart no matter when you decide to share the link!
Other Ways to Get Blocks Rock! and Supplies from Donations or for Free
Here are other options you can explore for getting Blocks Rock! and other supplies for free for your classroom or organization: